Quick Start
This guide takes you from a fresh installation to a working monitoring setup with data collection, thresholds, and notifications.
Installation
If you already have a running NetXMS installation, skip to Initial Credentials.
The fastest way to get a complete stack — server, agent, web management console, and PostgreSQL database — is Docker Compose:
git clone https://github.com/netxms/docker.git
cd docker/deployment-example
cp .env.example .env
docker compose up -d
docker compose logs init
The first start initializes the database automatically and generates a random password for the admin user.
The last command prints the log of the init container, which contains that password (see Initial Credentials).
Once the containers are up, open the web management console at https://localhost:8443 (it uses a self-signed certificate, so the browser will show a warning).
This setup is meant as the quickest path to a working system for evaluation.
For anything longer-lived, pin a specific version and change the database password in .env — see Docker Compose Deployment for details.
For native installation, see Linux, Windows, or macOS.
Initial Credentials
During database initialization, nxdbmgr init generates a random password for the admin user and prints it to the terminal:
IMPORTANT: Generated admin password
   Login:    admin
   Password: <generated password>

Please save this password - it will not be shown again.
You will be required to change it on first login.
The password is shown only once — save it before closing the terminal. On first login you will be asked to change it.
With the Docker Compose setup, database initialization runs inside the init container.
Retrieve the generated password from its logs:
docker compose logs initTo set a specific password instead of a generated one, pass -p <password> to nxdbmgr init.
Agent Configuration
The NetXMS agent requires minimal configuration: the server address and log file path.
Windows
The Windows installer automatically generates the configuration file at C:\NetXMS\etc\nxagentd.conf.
If the correct server address was specified during installation, no further action is needed.
MasterServers = 127.0.0.1
LogFile = {syslog}
The special value {syslog} sends agent log messages to the Windows Event Log; replace it with a file path (e.g. C:\NetXMS\log\nxagentd.log) to log to a file instead.
Linux
On Linux systems, create or edit /etc/nxagentd.conf:
MasterServers = 127.0.0.1
LogFile = /var/log/nxagentd
Replace 127.0.0.1 with your NetXMS server IP address.
MasterServers acts as a whitelist — the agent only accepts connections from the listed addresses and drops all others.
|
Server Configuration
NetXMS server has two configuration sources:
-
Configuration file (
netxmsd.conf) — static settings that require a server restart to change. Used primarily for database connection credentials and extension module loading. -
Server configuration variables — stored in the database and changeable at runtime through the management client. Most operational settings (polling intervals, thresholds, retention policies, etc.) live here.
For the full reference, see Server Configuration.
Configuration File
The configuration file must specify at minimum the database driver, connection parameters, and log file.
Supported database drivers:
| Driver | Description |
|---|---|
|
PostgreSQL (including TimescaleDB) |
|
MySQL |
|
MariaDB |
|
Microsoft SQL Server |
|
Oracle Database |
|
ODBC (connects to any supported database via ODBC) |
|
Embedded SQLite (evaluation only) |
Windows: The installer populates C:\NetXMS\etc\netxmsd.conf.
Linux: Create or edit /etc/netxmsd.conf:
DBDriver = pgsql
DBServer = localhost
DBName = netxms_db
DBLogin = netxms
DBPassword = password
LogFile = /var/log/netxmsd
Set Up Notifications
Configure a Notification Channel
Notification channels define how NetXMS sends alerts — via email, messengers, SMS, etc.
Configure channels in . Example SMTP email configuration:
Server=smtp.example.com
[email protected]
FromName=NetXMS Server
IsHTML=no
TLSMode=TLS
Login=smtp-username
Password=password
Create an Action
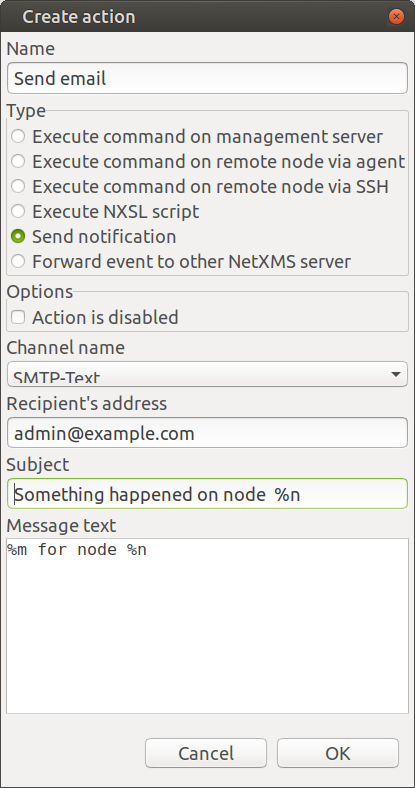
Create a notification action in :
-
Set the action type to your notification channel
-
Specify recipient addresses (separate multiple recipients with
;) -
Configure subject and message using macros:
-
%n— node name -
%m— event message
-
Configure Event Processing Policy
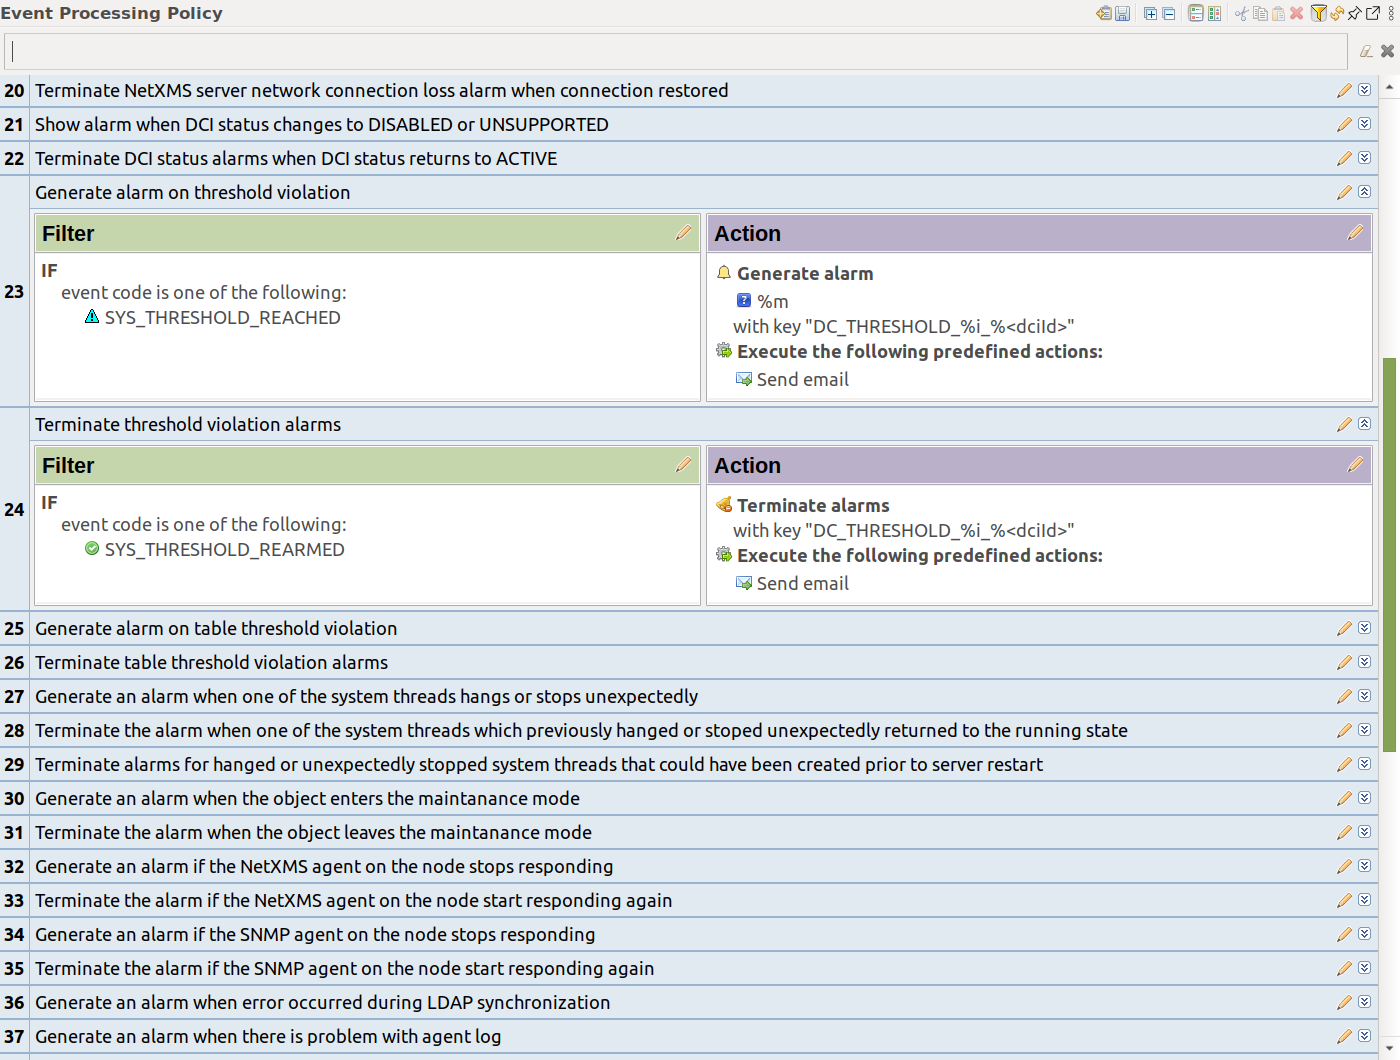
Open to set up alarm and notification rules:
-
Find the built-in rules "Generate alarm on threshold violation" and "Terminate threshold violation alarms" (they match
SYS_THRESHOLD_REACHEDandSYS_THRESHOLD_REARMEDevents) -
Add your notification action to these rules
-
The first rule creates an alarm with a key combining the source object ID, DCI ID, and instance
-
The second rule automatically terminates the matching alarm using the same key
-
Save the policy
Configure SNMP Defaults
If your network has SNMP devices with common credentials, configure defaults in .
During configuration polls, NetXMS tries the configured community strings, USM credentials, and ports sequentially until finding a working combination.
Enable Network Discovery
Passive Discovery
Passive discovery finds new devices by querying ARP and routing tables from known nodes, without sending probe traffic.
-
Open
-
In the General section, select Passive only
-
Optionally enable SNMP trap source address as a discovery source
-
Save the configuration
| For large networks, initial discovery may take several hours. Let NetXMS run overnight to gather complete network information. |
Requirements for successful discovery:
-
NetXMS server must have SNMP access to switches and routers
-
Device credentials must be added to the default credential list in
Add Nodes Manually
If discovery does not find all devices, add nodes manually:
-
Right-click on Infrastructure Services in the object tree
-
Select Create node
-
Enter the node’s IP address or hostname
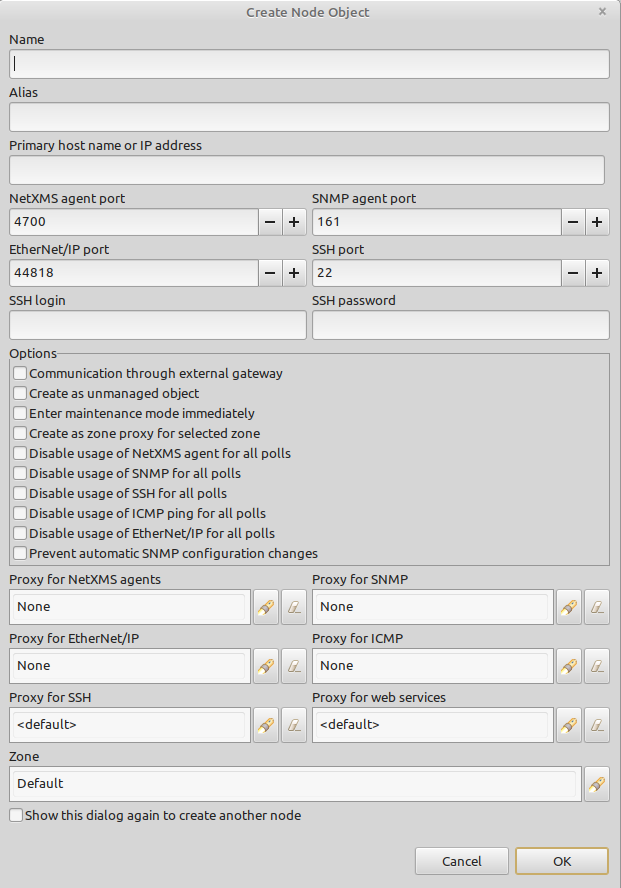
Node creation may take a moment while NetXMS performs initial polling. The node is automatically placed under the appropriate subnet.
Create Data Collection Items
Data Collection Items (DCIs) define what metrics to collect, how often, and what thresholds to check.
CPU Usage (Agent)
-
Select a node and open the Data Collection tab
-
Click the + button to add a new DCI
-
Set origin to NetXMS Agent
-
Click Select to browse available metrics
-
Search for
CPUand selectSystem.CPU.Usage -
Go to the Threshold tab and click Add
-
Configure: if last polled value > 85, generate
SYS_THRESHOLD_REACHED; when back to normal, generateSYS_THRESHOLD_REARMED -
Click OK
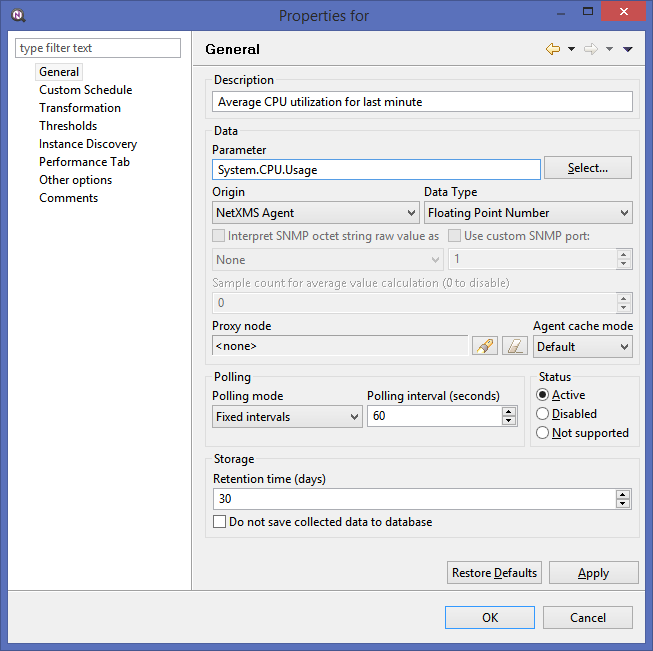
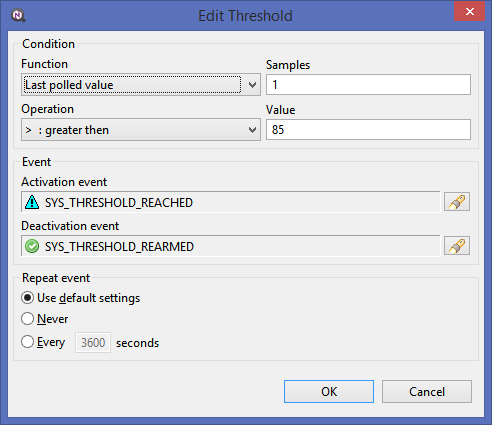
The DCI will now collect CPU usage every 60 seconds, store data for 30 days, and generate an alarm when usage exceeds 85%.
Interface Traffic
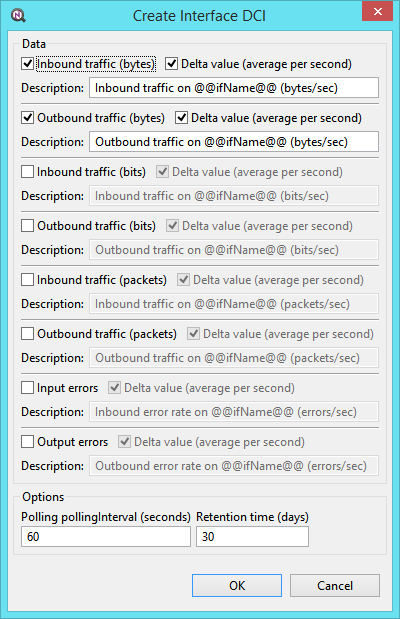
To quickly set up traffic monitoring on network interfaces:
-
Expand a node in the object tree and select one or more interfaces
-
Right-click and select Create data collection items
-
Check the metrics you need (bytes in/out, packets, errors, etc.)
-
DCIs are created automatically
Interface Traffic Templates
Creating DCIs interface by interface does not scale beyond a handful of nodes.
NetXMS ships three built-in templates for this purpose — "Interface Traffic Agent 32-bit counters", "Interface Traffic Agent 64-bit counters", and "Interface Traffic SNMP".
Each collects inbound and outbound traffic per interface using instance discovery, and each has an auto-apply rule, so you do not need to apply them manually.
The templates are imported automatically at server startup (see Server.ImportConfigurationOnStartup in Server Configuration Variables) and are located in the Templates perspective, group Interface Traffic.
To enable traffic collection on a node:
-
Open the node’s Properties, go to Custom Attributes, and add the attribute
Template.InterfaceTrafficwith the valueyes. -
Wait for the next automatic binding poll, or select in the node’s context menu. The template matching the node’s capabilities — agent with 32-bit counters, agent with 64-bit counters, or SNMP — is applied automatically.
-
Wait for the next instance discovery poll, or select in the node’s context menu. Traffic DCIs are created for Ethernet and point-to-point interfaces whose Expected state is Up. Loopback interfaces are skipped.
To enable traffic collection on many nodes at once, add Template.InterfaceTraffic to a container and mark it Inheritable, so that all nodes in the container get the attribute (see Inheritable Attributes).
To exclude an interface, set the custom attribute Template.InterfaceTraffic to no on the interface itself, or add the custom attribute Template.InterfaceTraffic.Exclude to the node with a comma-separated list of interface names.
Removing Template.InterfaceTraffic from a node later does not remove the template.
See Auto-Apply Rules for details on how auto-apply rules are evaluated.
Next Steps
With basic monitoring configured, explore these topics:
-
Architecture — understand the object model and event processing in depth
-
Installation Guide (Linux, Windows, macOS, Docker) — detailed installation procedures
-
Agent Management — advanced agent configuration and tunnels
-
Data Collection — DCI configuration, instance discovery, and thresholds
-
Event Processing — full event processing policy configuration
-
Object Classes Reference — complete list of all object types and their relationships